
We mainly follow six steps to perform the hip joint examination :
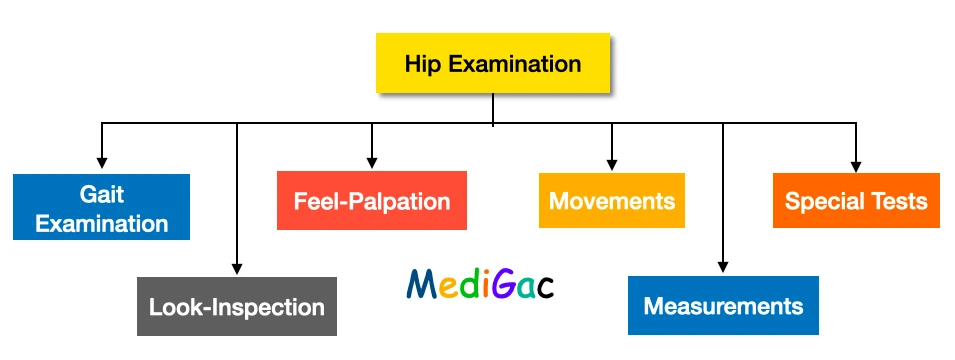
- Gait examination
- Look or Inspection
- Feel or Palpation
- Movements
- Measurements
- Special tests
Now we are going to discuss one by one of each examination. So we are going to start with the Gait examination and then we will proceed further with the others.
I. Gait examination :
Definition : During locomotion, a gait is a pattern of limb motions. The numerous ways in which a human can move, either naturally or as a result of specific training, are referred to as human gaits.
Gate examination is a large topic, so we have decided that we are going to discuss the topic into a separate post. The link of the post is given below.
II. Look-Inspection :
1. Standing patient :
In standing patient we mainly observe from three sites : Front, side and back
A. Fornt site :
In this inspection we look for :
- Rotational deformity
- Pelvic tilting
- Groin region – Anterior iliac spine, iliac fossa, and groin fold.
Other than this we also look for :
- Knee – Patella, flexion of the knee
- Leg – foot and the heel touching the ground or not.
- Muscle wasting
B. Back site :
Here we look for mainly eight things :
- Gluteal muscle Wasting
- Scapula
- Scoliosis
- Sinus scars – secondary to tuberculosis
- Posterior superior iliac spine
- Gluteal folds
- Popliteal fossae
- Heels
C. Side :
Here we look for mainly four things :
- Abdomen – Abdominal protrusion, Buttocks,
- Increased Lumbar lordosis which is suggestive of fixed flexion deformity of the hip
- Supra and Infra-trochanteric depression
- Knee flexion and recurvatum
2. Sitting patient :
Here we look for mainly two things :
- Posterior superior iliac spine
- Scoliosis
3. Supine patient :
Here we look for mainly two things :
- Position and posture of the lower limbs and pelvis
- Shortening of the lower limb
4. Prone patient :
We said the patient to lie-down in this position if the patient can not able to stand and also in bed sore condition.
III. Feel-Papation :
Palpation is done in supine, prone and lateral position.
1. Temperature :
We palpate the temperature by following instructions :
- Temperature is felt with the dorsum of the dominant hand.
- Then we have to feel the temperature over the femoral triangle to make note, compare and comment.
- According to the order, we first have to palpate the normal side and then the affected or pathological side.
2. Tenderness :
To palpate the tenderness we mainly use two methods – Direct and Indirect.
Direct method is also known as Anterior hip point and indirect method is also known as Morris Bi-trochanteric compression test.
Anterior hip point :
This joints is placed at 1.5 cm below and lateral to the mid inguinal point.
Just lateral to the groine, palpate along the front of the hip. Tenderness in this area could indicate femoral head osteoarthritis (OA), fracture, or avascular necrosis. Palpate the anterior superior iliac spine (ASIS) at the iliac crest’s anterior tip.
Morris Bi-trochanteric compression test :
- The patient is said to lie-down in supine position.
- Then the examiner places both hands over the trochanter.
- Now the observe the patient’s face and applies medially directed force with both the hands.
- A painful expression is seen in various cases like – fracture of acetabulum, TB hip, Perthes disease, fracture of the femoral neck and trochanter.
3. Bony prominence :
We check mainly four bony prominence, and they are :
- ASIS(Anterior superior iliac spine)
- Symphysis pubis
- Pubic tubercle
- Tip of greater trochanter
4. Soft tissue :
In soft tissue palpation we mainly palpate six things, and they are :
- Adductor muscles Roll test – The patient should be in supine position, and the examiner stands on the affected side of the patient. Now using the distal hand, the examiner rolls the thigh medially and laterally, and using the proximal hand the examiner palpate the muscle.
- Femoral pulse – The patient should lie-down is supine position and the examiner checks for the site and volume.
- Inguinal lymph nodes – The patient should be in supine position.
- Iliac fossa – Patient – Supine position.
- Gluteal region – The patient should be in prone or lateral position. And the examiner checks for any abnormal swelling, muscle wasting and cold abscess.
- Sciatic point – The patient should be in prone or lateral position. Then the examiner palpates it mid way between the ischial tuberosity and the posterior border of the trochanter.
IV. Movements :
1. Flexion-Extension :
A. Flexion :
1. To eliminate the lumbar curve and stabilise the pelvis, the good hip is initially flexed. The patient is then instructed to keep the leg in this posture.
2. The hip is next flexed, and a hand is used to make sure there is no more pelvic movement. Take note of the range of motion. The normal flexion range is 120 degrees.
3. The range of flexion is measured by bending the hip into 30-90 degrees : a fixed flexion deformity of 30 degrees and hip flexions to 90 degrees.
B. Extension :
1. The examiner lays a hand behind the lumbar spine to assess whether there is any rise in lumbar lordosis in the spine at rest, and whether this has been eliminated later in the examination.
2. The examiner now fully flexes the normal hip, seeing with the hand that the lumbar curvature is completely gone.
3. If the hip being evaluated rises from the couch, it suggests that it has lost extension. Any loss should be quantified and documented. Thomas’s test is the name given to this test.
4. The examiner flips the patient over onto his face and steadies the pelvis with one hand to check for modest deficits of extension, especially when the opposite hip is normal.
5. The examiner lifts each leg one at a time,
comparing the range of motion.
—> 5-20 degrees is the normal range of extension.
2. Abduction-Adduction :
A. Abduction :
1. If the pelvis tilts during the examination, a misleading impression of hip movement may be gained, thus grip the opposite anterior superior iliac spine with fingers and thumb first, then anchor the other spine with the forearm.
2. Flexing the opposite leg over the edge of the couch and checking that the pelvis does not shift by gripping the anterior superior iliac spine on the side being examined is another approach to fix the pelvis.
3. After you’ve stabilised your pelvis, move your leg laterally to see how much range you’ve gained.
Abduction range = 40 degrees is the normal range.
Abduction can also be tested from a 90-degree hip flexion starting point. In cases of suspected hip osteoarthritis or congenital dislocation, this test is especially useful.
4. Patrick’s test – This is essentially a variant on abducting the hip from a 90-degree flexion position. The first indicator of osteoarthritis in a hip is pain during the motion.
The examiner flexes both hips and knees, places the right foot on the left knee, and softly presses down on the right knee to perform. The faber(Flexion,Abduction,External rotation) sign is another name for this sign.
B. Adduction :
- To allow the injured leg to be adducted while in full extension, an assistant should elevate the normal leg out of the way.
- If the examiner don’t have a helper, then the examiner should cross the leg being examined over the other. This causes a small bending of the leg being checked, although it is accurate enough in most cases. The legs should cross around mid-thigh if the hip is normal. Adduction can also be tested from a 90-degree hip flexion starting position.
3. Internal and External rotation :
B. Internal rotation:
- By supporting the knee with one hand and moving the foot laterally to create internal rotation of the hip, the examiner stabilises the flexed hip. Although the foot moves laterally and the hip rotates internally, the foot moves laterally and the hip rotates internally.
- The examiner then compares the location of the leg with the midline to determine the range of internal rotation. Normal range of internal rotation at the 90 degree flexion is almost 45 degree.
- By requesting the patient to keep their knees together as the examiner moves both feet laterally, a sensitive comparison of the sides can be achieved.
B. External rotation :
- The hip is in the same position as when assessing internal rotation, but the foot is moved medially.
- Normal range of external rotation at 90 degree flexion is 45 degree.
- By crossing one leg over the other, you may compare the two sides.
V. Measurements :
1. Apparent measurement :
- This is utilised to determine how much natural compensating has been done to hide the deformity or discrepancy in the hip joint.
- This test is done without squaring the pelvis.
- Measurement is done from a fixed point that is Xiphisternum to the tip of medial malleolus with the lower limb in the position of ease.
2. True measurement :
- This is done after the squaring of the pelvis.
- Measurement is done from ASIS to MJL and MJL to the tip of medial malleoli.
Other specific tests :
- Bryant’s triangle – This is done to quantify if there is any supratrochanteric shortening.
- Nelaton’s line – The Nelaton’s Line is a theoretical line traced from the anterior superior iliac spine to the tuberosity of the ischium in a moderately flexed hip.
- Morris Bi-trochanteric test – This is used to detect any protrusion acetabula, and central dislocation of hip.
VI. Special tests :
1. Trendelenburg’s sign :
The Trendelenburg sign is positive if the pelvis descends considerably on the side opposite the stance leg (the’swing limb’) when standing on one leg (the’stance leg’). Muscle weakness is seen on the stance leg’s side.
2. Telescopic test :
- A 90 degree Hopkin’s telescopic examination is beneficial for evaluating and recording oral cavity lesions, particularly in patients with limited mouth apertures.
- It is an effective method for screening high-risk individuals, as it allows for objective examination and documentation of the lesion.