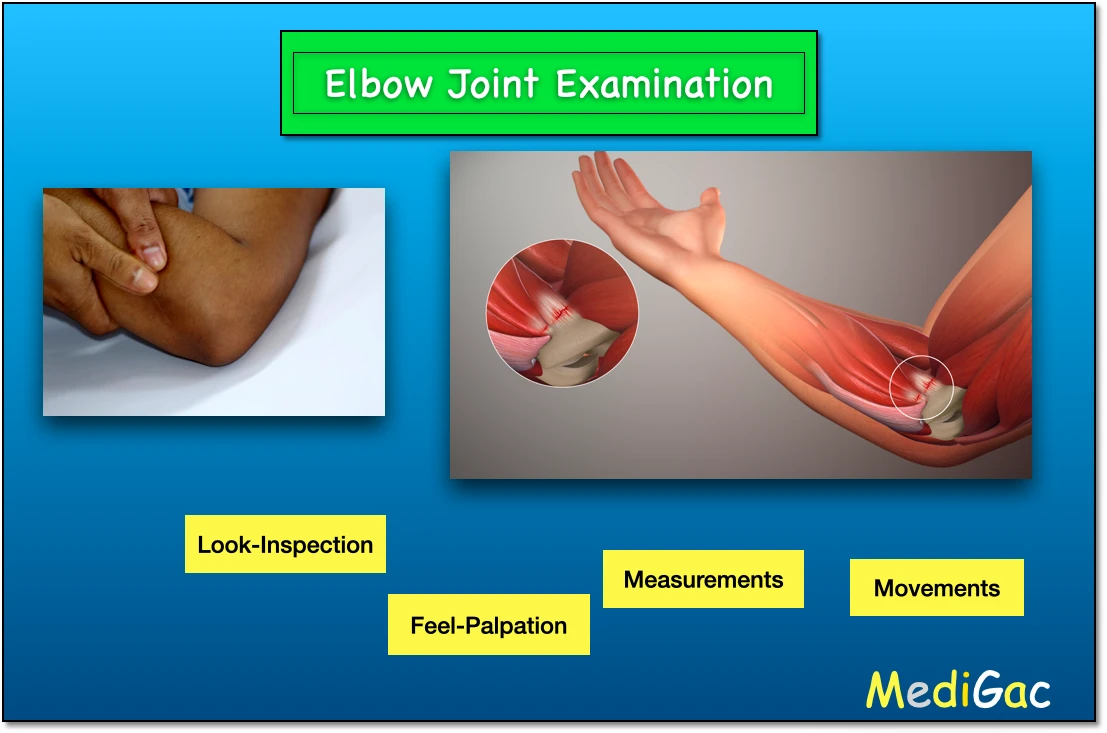
I. What we will check in ‘Look’ or ‘Inspection’ :
1. Inspection from front :
Inspection from the front, mainly involves two things that is – flexion deformity and the carrying angle.
Other observations : When the patient can’t be able to extend the elbow top its full length, also can’t able to make the forearm in fully supinated, then we can check the cubital fossa depression, shape and bulge of the upper forearm, biceps bulge, wasting, any swelling, scars, sinus, and venous prominence.
2. Inspection from back :
During inspection from the back site, we mainly check for :
- Scars
- Sinus
- Venous prominence
- Olecranon process prominence
- Triceps tendon
- Any abnormal swelling or lump
3. Inspection from side :
In inspection from the side, we check for :
- Scar, wasting, venous prominence
- Presence of any lump or swelling
- Fixed flexion deformity
- Proximal brachioradialis bulge
II. What we will check in ‘Feel’ or ‘Palpation’ :

1. Palpation of temperature :
- The examiner use the backside of the fingers of dominant hand to feel or palpate the temperature over the cubital fossae and anconeus triangle.
- First the examiner palpate the normal side and then the affected side.
2. Palpation of Lump :
Presence of any lump or swelling should be precisely palpated by the examiner. In this palpation of the elbow joint we can find some common abnormalities like :
- Lateral epicondyle fracture
- Myositis ossifficans
- Dislocation of radial head
3. Palpation of Medial and Lateral epicondyles of right elbow:
- At first the examiner finds and confirms the medial and lateral supracondylar ridges.
- Then, slide downs the fingers distally until the medial and lateral epicondyles.
- Finally the examiner can note and comment on tenderness like in lateral epicondylitis, medial epicondylitis, tennis elbow.
4. Palpation of supracondyler ridges :
By palpation the ridges the examiner used to note and comment on their tenderness, irregularity and thickening.
Right side palpation :
- First the patient is requested to sit and then the examiner stands behind the patient’s right side.
- Then the examiner holds the distal arm of the patient in a manner like the elbow gets flexion of about 90 degrees.
- And the examiner used to abduct slightly and extend the arm, until the tip of the olecranon process gets clearly visible.
- Then, the examiner uses his/her left hand’s index/middle finger(On medial side), thumb(Lateral side) and the palm(Posterior side) to palpate the fleshy mid arm in the downward manner, until finding the starting of hard bony ridges.
5. Palpation of Olecranon process and its tip :
- Here the clinician starts palpating from the subcutaneous border of the ulna from just above the wrist.
- Then gradually starts to proceed proximally until reaching the wider end that is the olecranon process.
- After that the examiner moves his fingers upwards to reach towards the prominent end of the ulna that is the ‘tip of olecranon process’.
- And finally the examiner comments and note downs all the abnormalities.
6. Palpation of right radial head :
- The examiner starts palpating the lateral epicondyle and further to the lateral joint line.
- Then the clinician starts moving below and distally in intention to make a note of dimple and also to palpate the distal portion for finding the smooth, rounded surface of bone.
7. Palpation of the right ulnar nerve :
- First the patient is requested to sit and then the examiner stands behind the patient’s right side.
- Then the examiner holds the distal arm of the patient in a manner like the elbow gets flexion of about 90 degrees.
- Finally the examiner starts palpating the above and posterior part of the medial epicondyle using the pulp of the 2nd, 3rd and 4th fingers
8. Palpation of intra-articular fluid :
Palpation can be done only if there is collection of larger amount of fluid.
Small amount of fluid can be diagnosed by radio imaging, like plain X-Ray.
III. What we do in checking Movements :
1. Flexion-Extension :
To check the range flexion-extension we request the patient to be on three position :
- The patient is seated at a table by the bedside
- The patient sitting or standing without any table
- In hyperextension condition
2. Pronation-Supination :
- The patient is requested to stand or sit with both the arm hanging should hang freely and both elbows should be flexed to 90 degrees.
- Then the examiner performs the exam by requesting the patient to hold 2 long pencils or pens in clenched fists keeping the wrist neutral.
- The examiner now instructs the patient to maximally rotate his or her forearms such that the fingers face downwards to the floor and then upwards to the roof.
- Then finally then examiner notes down and comments on the angle made by the pencil or pen.
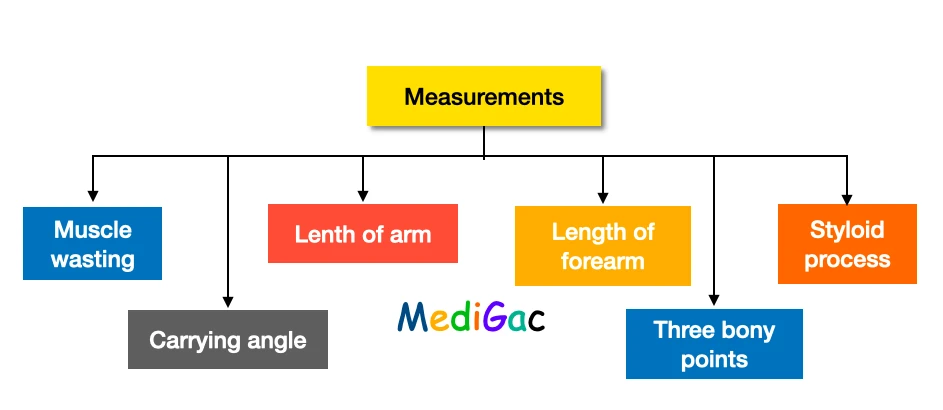
IV. What are the measurement of Elbow joint :
1. Muscle wasting :
- The girth of the arm and forearm is measured at a point where there is a significant visible difference. For both sides, it should be measured at the same distance from a fixed bony point of the elbow.
- As a result, the examiner measures the normal side’s girth first, then the pathological side.
2. Carrying angle :
- The forearm and hands should be around 5 to 15 degrees away from the body when the arms are held out at the sides and the palms are facing front.
- This is the elbow’s normal “carrying angle.” When a person swings their arms, such as when walking, this angle permits the forearms to clear the hips.
3. Length of arm :
- The patient is asked to sit or stand.
- Then, the examiner starts palpating downwards from the muscular region of the root of the neck and shoulder through the trapezius and supraspinatus muscle.
- The palpation goes on, till the examiner able to find the sharp and horizontal bony ridge, known as scapular spine.
- The examiner then begins palpating laterally down the scapula’s spine until the sharp angular bend at the outermost lateral section is reached. The acromion angle is the name for this angle.
4. Length of forearm :
- Suing the two index fingers, the examiner identifies the ipsilateral radial styloid tip and then palpates simultaneously along the ulnar styloid.
5. Relationship with three bony points :
The examiner identifies the three points and they are :
- Lateral epicondyle
- Medial epicondyle
- Tip of the olecranon process
Then, measures the distance between two epicondyles and the distance between the tip of the olecranon process to the lateral and medial epicondyle.
6. Relationship with the styloid process :
- The patient is asked to stand
- Then the examiner comes infant of the patient .
- And using the pronated and semi-flexed hands, holds the patient’s palmar flexed hand in a manner like the the thumbs gets placed on the dorsal and the 3rd, 4th, and 5th fingers supports the palm.
- Now, finally the examiner simultaneously palpate the radial and ulnar styloid.
V. What are the special tests :
1. Epicondyle tests :
- Lateral epicondyle tests
- Medial epicondyle tests
2. Stability tests :
- Posterolateral rotatory instability of elbow
- Ligamentous instability of the elbow
3. Neuromuscular tests :
- Pen test
- Nail test
- Tinel’s sign test for Cubital tunnel syndrome
- Flexion test for Cubital tunnel syndrome
- Ochsner’s pointing index sig