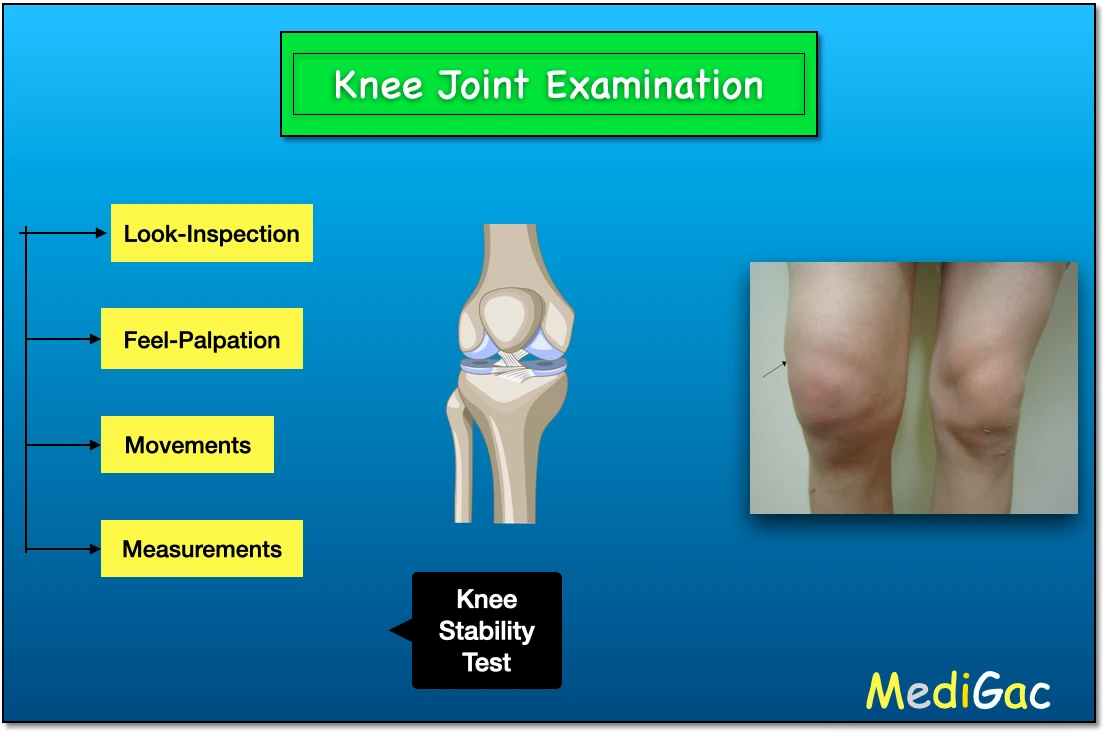
What we will check in ‘Look’ or ‘Inspection’

This is the general inspection and here we check for :
- Skin : Scars, erythema, lacerations
- Soft tissue : Effusion(fluid buildup in anatomic space), Muscle wasting
- Bones : Genu varus and Genu valgum
- Antalgic Gait
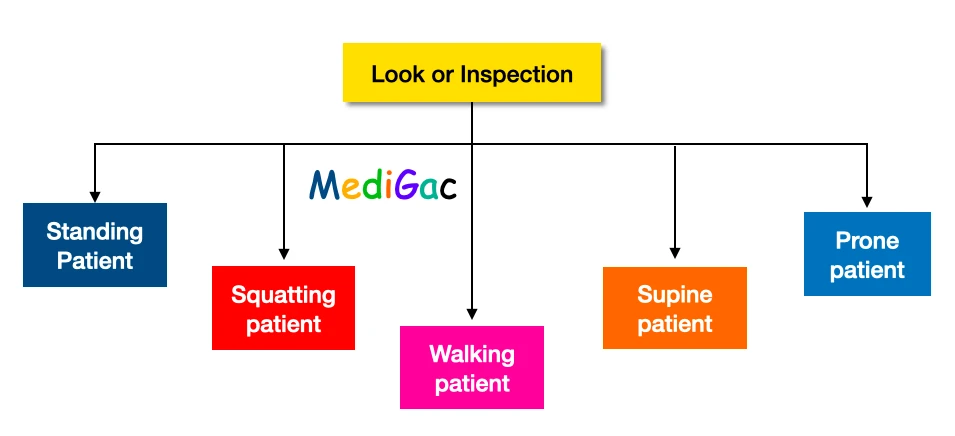
1. Standing patient :
The patient is said to stand, and the doctor check from three side that is front, side and behind.
- Front – We should make a note on genu valgum/ genu varum, any swelling, muscle wasting, patellar position, position of tibial tubercle, the patellar tendon, supra and infra patellar fossa and supra patellar quadriceps bulge
- Side – By viewing from side, we can see any flexion or any abnormal prominence of the fibular head and the femoral condyles.
- Behind – Here we look for any abnormality of the hamstring insertion, any swelling, scar, ulceration and if any venous prominence present we note that.
2. Squatting patient :
- The patient is said to set in squatting position. And ask to start squatting.
- If the patient is getting pain during this work, then he/she might suffering from Joint inflammation(Osteoarthritis) most commonly.
3. Walking patient :
- The patient is said to walk freely on the floor.
- We have to observe for Antalgic gait
Antalgic Gait :
- Antalgic gait is one of the most common types of altered gait in individuals who visit the emergency room or their primary care physician’s office.
- It refers to an irregular pattern of walking caused by pain and resulting in a limp, in which the stance phase is shorter than the swing phase.
4. Supine patient :
Most of the orthopaedic examinations are done in this position, and here we check for :
- Genu valgum and genu varum
- Swelling or any wasting
- Position, size and shape of the patella
- Supra and Infra patellar fossae
- Patellar tendons
- Tibial tubercles position
- Bulge on the supra patellar quadriceps
5. Prone patient :
After examination in the supine position we tell the patient to be on prone position.
This test is done to asses the meniscus – The knee was flexed at a 90-degree angle. One hand stabilises the hip, while the other grasps the foot and applies downward compression force while the leg is externally and internally rotated. Meniscal tear is indicated by pain during compression.
What we will check in ‘Feel’ or ‘Palpation’

In the Feel or Palpation part we check for mainly four things :
- Skin – Temnperature
- Soft tissue – Effusion(fluid buildup in anatomic space)
- Bone – Bony or tendinous tenderness
- If patient feels any pain, then we should observe the patient quickly to avoid the further processing.
1. Temperature :
We need to feel the temperature by the backside of the dominant hand.
We normally check the local temperature over the :
- Medial parapatellar fossae
- lateral parapatellar fossae
First we check on the normal side and then we check on the pathological slide.
Temperature gradient :
Simple gradient means the increase and decrease in the magnitude. So incase of temperature the gradient is called temperature gradient.
We check the gradient from the superior to the inferior part : Thigh-Knee-On to the legs.
Normally temperature decreases from superior to inferior. But incase of malignancy temperature increases from superior to the inferior site.
2. Tenderness :
We check for two types of tenderness like Bony tenderness and Joint line tenderness.
A. Bone Tenderness
To check the bony tenderness we must have to palpate total five parts :
- Patella – If any tenderness present over the patella then, we can diagnose according to the position. i) Tenderness at the superior tibia fibular ligament – Quadriceps insertional tendinopathy, and ii) Tenderness at inferior pole – Jumper’s knee .
- Ligaments/Bands – There may be presence of tenderness at the attachment of the MCL-LCL ligament and iliotibial band(ITB).
- Femoral tibial condyles – To palpate this, the patient has to flex his knee to 90 degree.
- Fibular head – We need to palpate this to check the biceps femoris insertion tendinopathy or any injury to the superior tibia-fibular ligament.
- Retropatellar site – Here we check mainly three sign, that is (i)Zohlen’s sign/Clarke sign,(ii)Facet tenderness test, (iii)Patellar grind test/Friction test.
| Zohlen’s sign/ Clarke sign | Facet tenderness test | Patellar grind test/Friction test |
| 1. Patient has to lie down in supine position with extended knee. 2. Then simultaneously we have to apply pressure on medial and lateral side of the proximal patella. 3. Ask the patient to contact the quadriceps muscles. 4. This act will show the sign positive if it cause pain. | 1. Patient is said to lie supine with extended knee. 2. Then we have to push the patella medially and elevating it. 3. Palpate to note the tenderness of the lateral retropatellar facet. | 1. Patient is said to lie down supine with extended knee. 2. We have to compress the patella using the fingers into the intercondyler groove. 3. With the other hand, we have to glide the patella in the intercondyler groove from medial and lateral and then superior to inferior. |
A. Joint line tenderness :
- We check this by saying the patient to sit with knee flexed to 90 degree.
- Then we have to palpate with the thumb.
Palpation :
- This is done from below to upwards along the anteromedial surfaces of the tibia.
- We have to start from the tibial tuberosity until it finishes into a groove. – This is called to be ‘Medial Joint Line’
- Then we repeat the procedure along the antero-lateral surface – This is said to be ‘lateral Joint Line’
Now we have to palpate circumferentially with the pulp of the thumbs along the Medial joint line and Lateral joint line.
If any tenderness or lump is found then we have to make a note.
3. Popliteal pulse :
Popliteal pulse can be felt best at the popliteal fossa. We can fell this by placing the fingertips of the both hands in the middle of the popliteal fossa while both thumbs rest on tibial tuberosity.
4. Patellar lift-off test :
- To do this test, we have to grasp the patella in pincer made by the thumb and middle finger.
- Then we will try to lift up the patella.
- In normal condition we can do this.
- But in case of synovial thickening the fingers slip-off the patella edges.
5. Supra Patellar bulge :
- This can occur due to synovial thickening or accumulation of intra-articular fluid.
- We can palpate the synovial thickening over the Vastus medals which sometimes feels as ‘Boggy’ or ‘Doughy’.
6. Intra-articular fluid :
This is a collection of fluid within a joint’s intra-articular area.
Depending upon the amount of fluid, it can be three types :
- Small amount of fluid – This can be diagnosed by two tests that is ‘Bulge test’ and ‘Patellar hollow test’.
- Moderate amount of fluid – This can be diagnose by ‘Patellar tap test’.
- Large amount of fluid – This can be diagnosed by ‘Cross fluctuation’.
A. Bulge test :
This test is performed with some steps :
- Patient is told to stand with the knee extended.
- Then we have to place the thumb and index finger on the medial and lateral parapatellar fossae.
- And with that compressing the medial fossae.
- Then we have to press sharply the lateral parapatellar fossa.
Now the medial fossa will refill with a ‘ripple’.
B. Patellar hollow test :
- In normal condition, when the knee is flexed, a depression appears and disappears just lateral to the patellar tendon.
- The depression starts to refill in the presence of intra-articular fluid.
- Now in presence of intra-articular fluid, compared to the opposite side knee, the affected side gets refilled at lower degree of flexion.
C. Patellar tap :
- Patient is said to extend the knee.
- Then we have to supra patellar bulge with the thumb and other fingers placed on the both sides.
- No start to push the fluid downwards under the patella.
- Now with the tip of the index and middle finger of the other hand, we sharply tap the centre of the patella.
Positive Patellar tap test – Now tapping on the patellar fossa, if it sinks to hit the inter condylar groove the femur and bounces up again.
D. Cross fluctuation :
- Patient is said to extend his knee.
- Then we place the thumb on one side and the other fingers on the other side of the supra patellar bulge.
- With the other hand, we have to place the thumb and other fingers on the medial and lateral infra patellar fossa respectively.
- Now we have to feel the transmitted fluid impulse by squeezing the supra patellar bulge and the infra patellar fossae.
What we will do in checking ‘Movement’

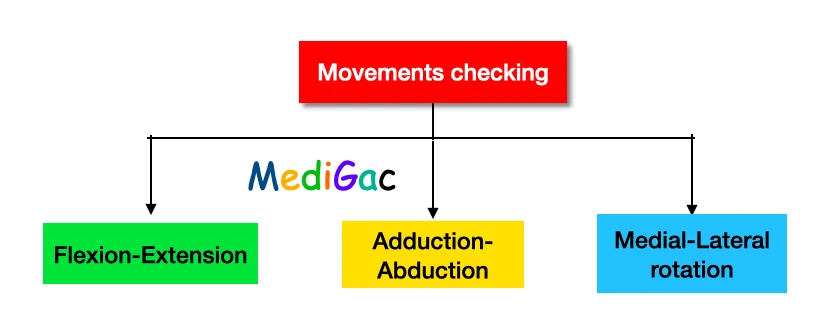
1. Flexion or Extension :
We prefer the flexion-extension of the knee in mainly two position :
- Supine Position – This is done by telling the patient to flex the ipsilateral knee at least 90 degree, then knee-flexion can also be noted.
- Prone position – If the patient an no able to do in supine position, then we say the patient to try it on prone position.
Neutral or Zero position – When the thigh and leg are completely aligned, straight, and moves simultaneously.
Quadriceps Lag – The lack of full knee extension with full quadricep contraction is referred to as extensor lag. Lack of full extension may be caused by a limited range of motion in the knee extension, but if that is ruled out, quad weakness is the main issue. Total knee replacement, ACL reconstruction, and patella tendon rupture are all common causes of extensor lag.
2. Adduction or Abduction :
- The patient is said to lie-down in supine position with the extended knee.
- Then we have to grasp the leg just above the ankle with one hand.
- The other hand is used to support the popliteal fossa.
- Now, both thumb and fingers are placed on both sides of the condyles.
- Now we can adduct and abduct the leg.
3. Medial and Lateral rotation :
- Here also, the patient should be on supine position, and using one hand we place the hip and knee are placed at 90 degree.
- Then with the other hand, we hold to give a stability to the knee.
- Now we can make rotation medially and laterally.
What is Stability test
1. ACL(Anterior cruciate ligament) test :
To test the ACL we have five tests :
- Lachman test
- Anterior drawer test
- Pivot-Shift test(Mcintosh test)
- Single foot hopping test
- Jerk test or Hughson test
2. PCL(Posterior cruciate ligament) test :
Here we can do two tests :
- Gravity sign/Sag sign
- Posterior drawer test
3. Meniscal Injury tests :
Here we can do four tests :
- Mc’murray’s test
- Apley’s grinding test
- Thessaly test
- Squat test
4. MCL/LCL(Medial colateral ligament and Lateral colateral ligement) test :
- At first the patient is said to lie-down in supine position with the knees extended and leg slightly externally rotated.
- We have to stand on the affected side of the patient.
- Now, using one hand, we have to grasp the femoral condyle from below to provide support.
- Using the other hand, we have to grasp the patients leg just above the ankle to note LCL insufficiency.
- Then we have to repeat the procedure with the knee flexion at 30 degree.
- Next valves stress is applied in that 30 degree knee flexion to note the MCL insufficiency.
- Finally we have to repeat the procedure on the opposite side of the patient.
5. Knee instability tests :
Here we do mainly two tests :
- Slocum test
- Dial test/Tibial external rotation test